Tail Light Tracker Manual
Model EM200/EM300
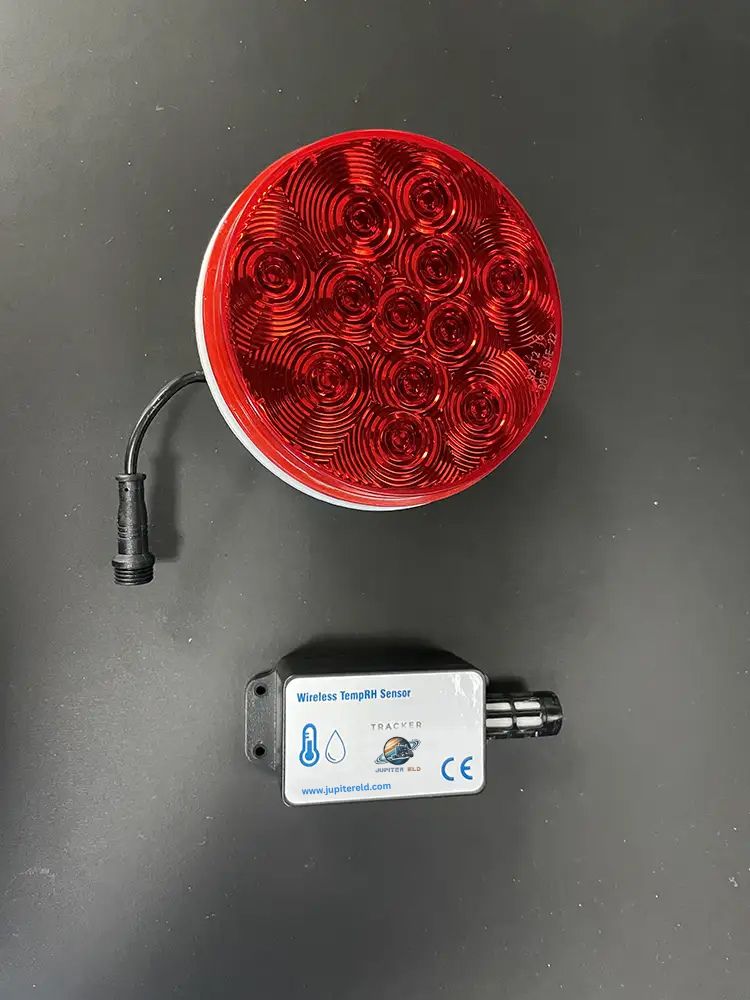
The Tail Light Tracker is a smart GPS tracker that also has all the functionality of a tail light. This allows it to be fully hidden, easy to install, and have continuous charge. This device turns a simple tail light into a feature rich asset tracker that can give you peace of mind knowing that your asset is always under your eye.
1. Technical Specifications
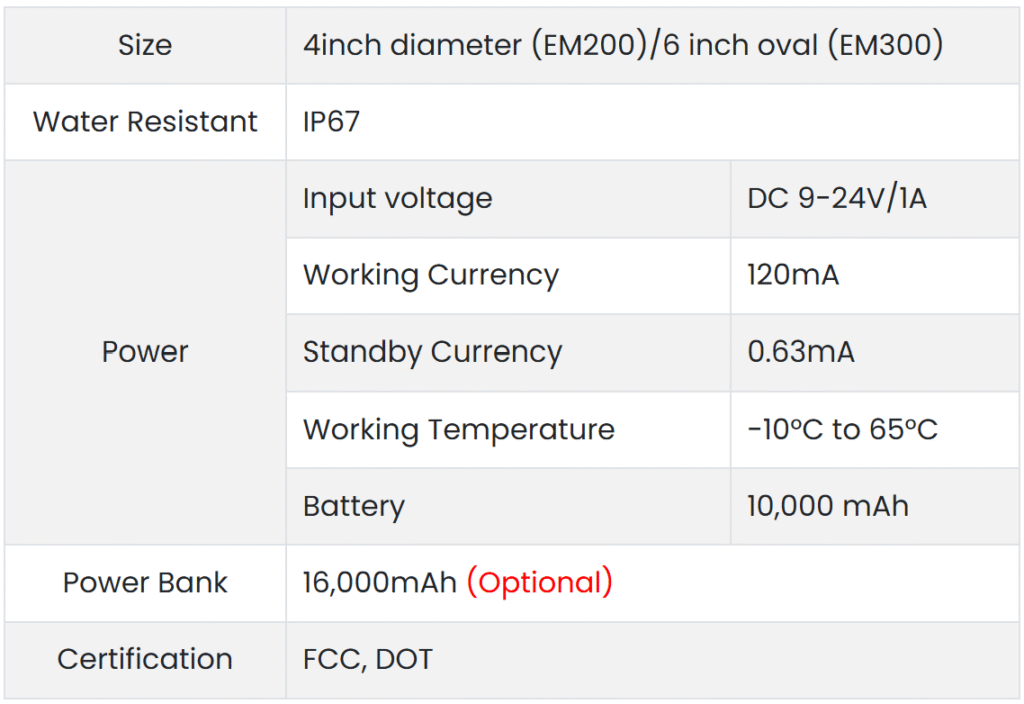
1. Technical Specifications
- Near Real time Tracking
- Share location with others automatically
- Speeding Alerts
- Geofence alerts
- Remote finding
- IP67 Waterproof & Dust resistant
- Flashing lights to find the trailer or create an alarm
To access all these features please log into our back-end portal. Visit www.jupitereld.com for more details on how to contact us for access to the back end portal.
3. Installation:
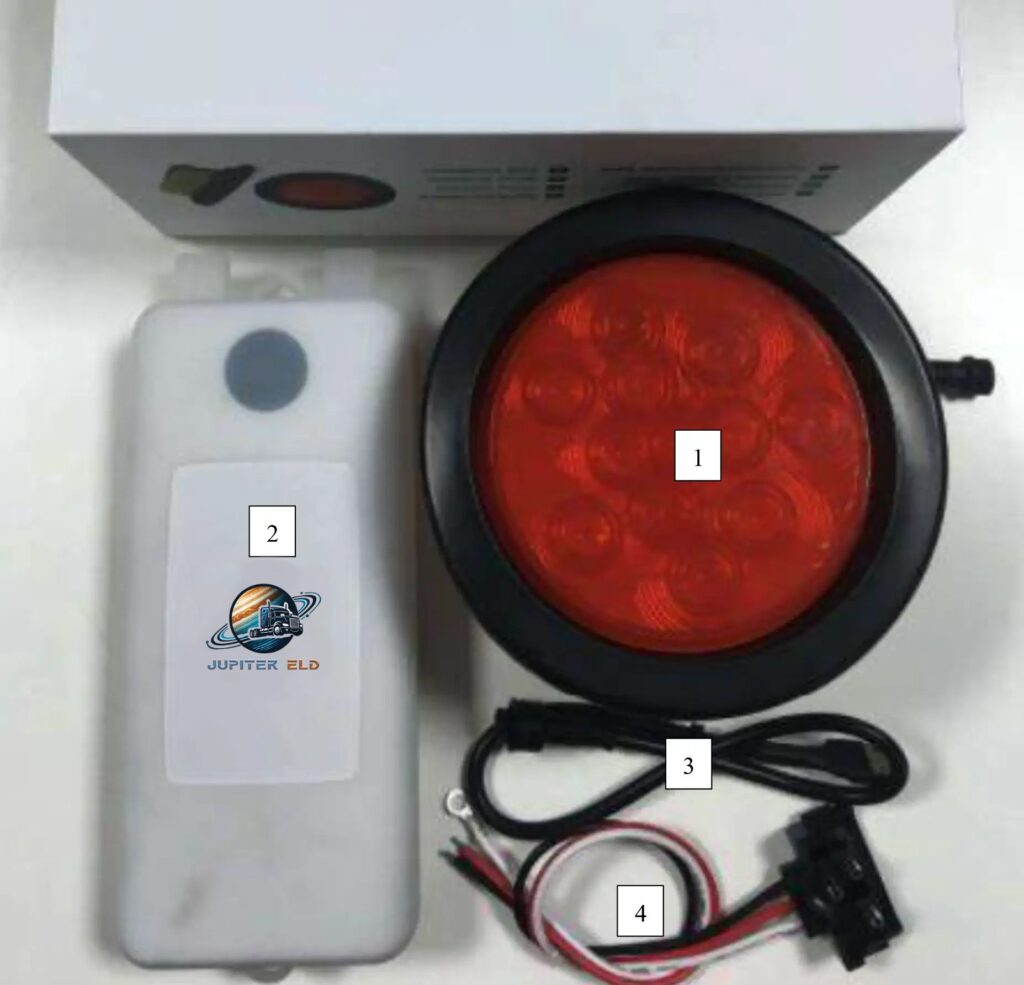
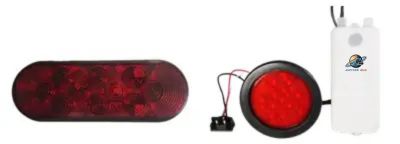
- 1- Tail Light Tracker
- 2- Power Bank (Optional)
- 3- Power Bank Charging Unit (Optional)
- 4- 3 prong wiring pigtail (Optional)
How to install the Tail Light Tracker without the power bank:
- Remove the current tail light from the tractor or trailer. Depending on how it is installed this might require a screwdriver. Ensure the 3 pin wiring plug is removed for this tail light.
- Keep the current Gromet in place and put it back first before putting the new tail light tracker. Ensure that the wiring of the previous tail light goes through the Gromet.
- Insert the 3-pin wiring plug from the old light into the Tail Light Tracker and make sure it clicks. There is a 3 prong wiring pigtail that can be used to connect the tail light tracker to the wiring of the asset, if needed.
How to install the Tail Light Tracker with the power bank:
- Remove the current tail light from the tractor or trailer. Depending on how it is installed this might require a screwdriver.
- Keep the current Gromet in place and put it back first before putting the new tail light tracker. Ensure that the wiring of the previous tail light goes through the Gromet.
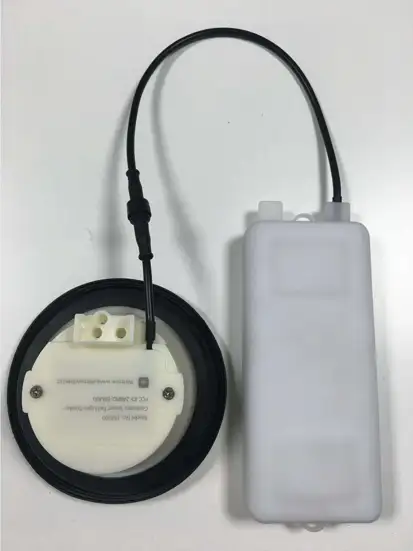
- Plug the Power Bank Charging unit into the Tail Light Tracker like below:
- Insert the power bank through the Grommet and store it in the channel securely. The Power Bank has 2 magnets to place it securely. Tie wrap is also available
- Insert the 3-pin wiring plug from the old light into the Tail Light Tracker and make sure it clicks. There is a 3 prong wiring pigtail that can be used to connect the tail light tracker to the wiring of the asset, if needed.
After all steps are done for either option above make sure to test the tail light by turning on headlights and brake lights. Congratulations! You have installed a brand-new state of the art tracking device.
Very Important: Please turn on headlights at all times to ensure that the Tail Light Tracker gets charged.
How to install the Tail Light Tracker without the power bank:
We can provide the cables and components to connect the Tail Light Tracker to the Trailer’s power source in addition to the back light. This will ensure battery to stay charged as and when a power unit is connected to the trailer and even when head lights are not turned on.
4. Decoys:
Decoy Tail Lights are also available. These look exactly like the EM200 or EM300 but without the GPS tracking features. The purpose of the decoys is to ensure that all the Tail Lights look exactly the same.
Temperature & Humidity Tracker Manual
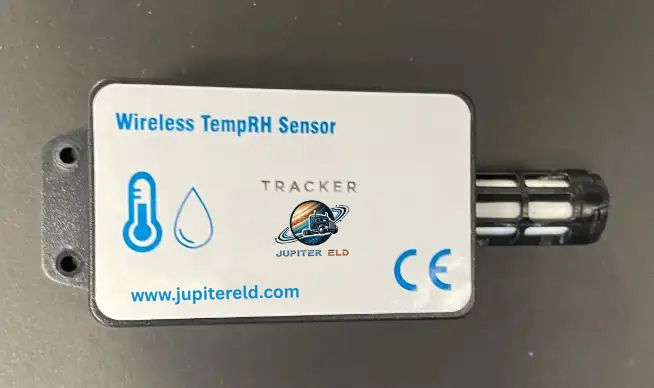
Technical Specifications
Description
The temperature and humidity tracker is a new designed high-quality wireless acquisition terminal. With long data transmission distance (300m), small size (63mm*38mm*31mm) and long battery life (3 years’ battery life if every 60s data), it is an important tool for any fleet manager. Temperature value is collected by the transmitter, then our Tail Light tracker will parse out information and reflect it in the back end portal. EveryTag06 has a one and only ID on factory setting. Combine with our Tail Light Tracker above and all steps are done. Congratulations! You have installed a brand-new state of the art tracking device.
Installation
- 1. Each Temperature tracker must be paired with a Tail Light Tracker that has been purchased from ELD Mandate. After connecting the TLT with the Temperature tracker the data stored in the temperature tracker can be shared in the Back-end portal: https://hos.jupitereld.com/login.html
- 2. Install the Temperature tracker near the back door of the trailer to have it as close to the Tail Light Tracker as possible.
- 3. Use the 3M tape to stick the Temperature tracker in the appropriate location of the trailer.
- 4. Congratulations!
Notes
- 1. Being close to a metal object will interfere with the signal, causing the signal to weaken.
- 2. Install the Temperature tracker near the back door of the trailer to have it as close to the Tail Light Tracker as possible.
- 3. Keep the signal visible to ensure accuracy of the data.